Your Keurig needs cleaning if it won’t brew a full cup of coffee because it is clogged. The brewing needle’s tip can be cleaned with a needle, and the accumulated coffee grounds can be removed.
Coffee from Keurig machines is renowned for being consistently good every day. However, this does not imply that there aren’t any issues with these coffee makers. Whether it’s wear and tear or manufacturing quirks, all kitchen appliances have their issues.
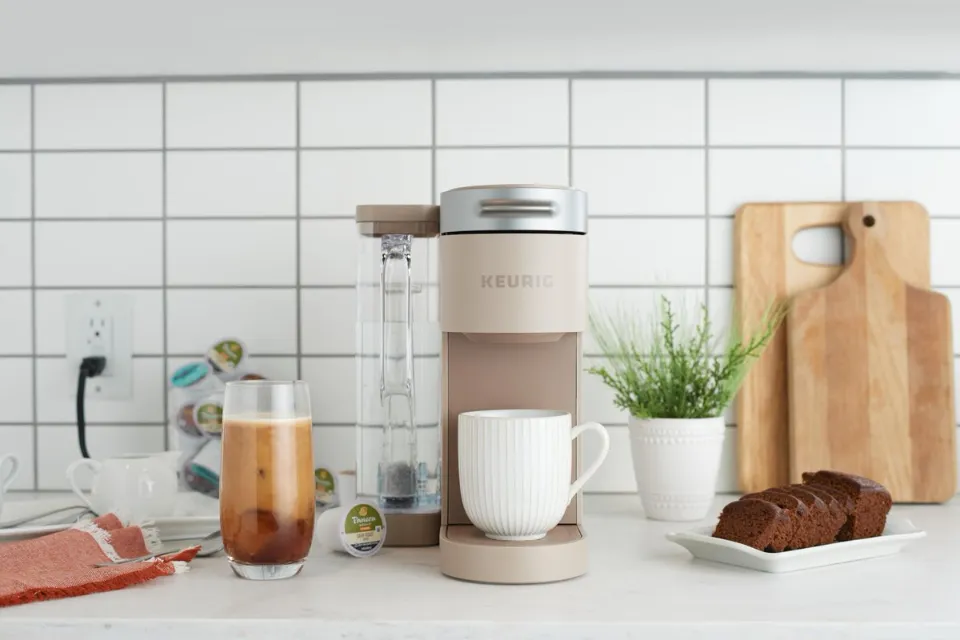
How a Keurig Coffee Maker Works
We are aware that the whole point of a Keurig is that you don’t need to know anything about brewing coffee. Even so, it’s a BLESSING to have some basic mechanical knowledge. It will see you in good stead for when you find your Keurig not working.
The basic workings of the Keurig original and Keurig 2.0 models are the same, despite the wide variety of models. There are two essential parts to the Keurig brewing process – the machine itself and the brand’s unique K-Cups.
Ready for the brewing process to start, the K-Cup is inserted into the chamber. It is punctured at the top by an upper needle, allowing hot water to enter. It’s simultaneously punctured at the bottom to allow the brewed coffee to exit into your cup. When you press the button to brew, water from the cold-water reservoir is pumped into the heating chamber.
The water is pumped to the brewer once it reaches the ideal temperature and then passes through the K-Cup’s grounds.
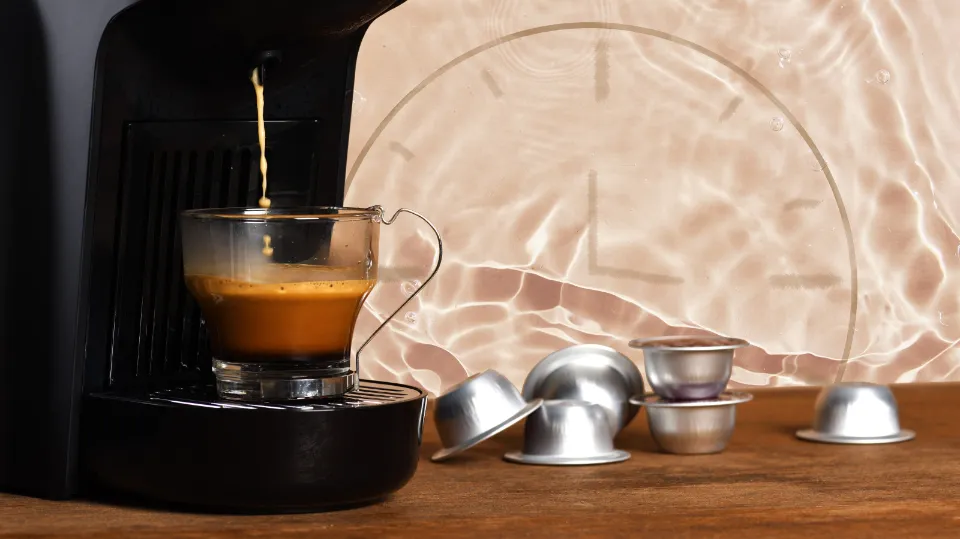
Despite being a capsule coffee maker, the Keurig uses an extraction method similar to drip coffee. Comparatively speaking, Nespresso coffee makers use pressure extraction just like an espresso maker.
Read More: Can You Make Dalgona Coffee With Keurig Coffee Maker? Yes!
Common Keurig Troubleshooting Issues
We’ve listed 11 typical issues with machines below.
1. My Keurig Won’t Switch On
It may seem simple, but if your coffee maker isn’t turning on, you should double-check all of the apparent solutions first:
- Check that the power cord is plugged into the socket properly
- Check that the power socket is functioning by testing other appliances
- Test the Keurig machine in a different outlet
If this doesn’t work, try these steps:
- For 10 seconds, keep holding down the power button.
- Remove the water reservoir from the device and unplug it. Prior to reassembling and turning on, let your Keurig sit without power for one hour.
It’s time to get in touch with Keurig customer service if you’ve tried everything listed above and the machine still won’t turn on.
2. My Keurig is Not Heating Water
If the water coming out of your coffee maker is cold even though it seems to be dispensing water correctly, you have a problem. This might not be an issue with the heating mechanism itself; rather, if the water pump is not functioning properly, it may shut off for safety reasons. The first thing to try with any electrical issue is to switch the machine off and on again. The heating system might be reset as a result.
The water may not be pumping correctly due to clogged or dirty pipes. Utilizing the cleaning instructions listed below, you can resolve this. Try depressing the brew button for five seconds to see if the problem is with the water pump. This will compel the pump to operate at full capacity. If none of these steps resolves the issue, you may need to replace the water pump in your Keurig machine.
3. My Keurig is Stuck in Preheating Mode
Your machine will need about 3 minutes to preheat before brewing. If it takes a lot longer than this, however, there might be a problem with the machine. The first thing to try is switching off and unplugging the machine to kickstart the preheating process again.
If that fails to fix the issue, there is an unofficial hack that might. Some users have discovered that forcing the machine into brew mode by adding hot water to the reservoir works. You should use this solution at your own risk because Keurig advises only using cold water in the tank.
4. My Keurig is Not Dispensing Water Properly
There’s a chance that one day when you press the brew button on your Keurig, you won’t get a full cup of coffee. This is quickly diagnosable and equally straightforward to fix.
Your machine’s water line will clog up with debris and coffee grounds over time. This indicates that during the allotted brewing time, very little water will actually pass through. Using the tips we’ve provided below, you can clean your machine thoroughly to solve this problem. After you have unclogged the water line manually, you can run the machine on a brew cycle using water only to rinse out any final bits of debris.
5. My Coffee Contains Grounds.
This is another issue that’s simple to diagnose and repair. Your machine needs cleaning, especially the exit needle, if you have coffee grounds in your cup. K-Cup grounds have a tendency to accumulate in the exit needle over time. When this happens, the grounds are pushed into your cup along the water line. This is particularly true if you brew hot chocolate or other sweet drinks, as the sugars can make the needle sticky.
To fix this, either use the Keurig tool or a paper clip to clean the needle. Then repeat the brew cycle using only water up until there are no more grounds visible in the water that emerges.
When using a reusable K-Cup, the needle might not be the issue if your coffee has grounds in it. Verify that the capsule is properly closed, that it is not overfilled, and that you are using the recommended grind size.
6. My Keurig is Leaking from the Bottom
You must identify the source of the leak in order to decide the best course of action. The most likely explanation is a leak in the cold-water reservoir if your machine leaks from the bottom even when it is not in use. To confirm this, remove the reservoir and see if the water has pooled underneath. Then hold the reservoir over the sink and see if any water leaks out.
A tiny rubber band called an O-ring is attached to the reservoir’s bottom. Water may directly leak from this if it is damaged or out of alignment. The only thing you need to make sure of is that you get the right size before replacing an O-ring yourself. You’ll need to order a replacement tank from your Keurig supplier if the water reservoir is damaged.
7. My Keurig is Leaking When Brewing
There are a few causes if the water leaks only during the preheating or brewing cycles. The first is simply filling the water reservoir to its maximum capacity, which is simple to do with devices like the K-15 Mini. It could also be a matter of the machine being clogged, in which case a good clean will remedy the issue.
A broken or loosened upper gasket is another frequent source of leakage. This silicone component forms a solid seal between the water hose and the K-Cup. By filling in any spaces between the puncture needle and the K-Cup, you can see if the gasket is positioned correctly. If the piece is broken or missing, you’ll need to order a replacement.
If neither of these two solutions fixes your leakage issue, the cause is most likely a broken valve or hose somewhere inside the machine. This will require you to contact customer care.
8. My Keurig Switches Off Mid-Brew
Keurig coffee makers have several safety features that will automatically switch off the machine. This guards against leaks onto your counter or damage to the machine. You must determine what the machine identifies as a safety issue in order to solve this issue.
The reservoir being improperly seated is most likely to blame. The vibrations of the brewing cycle can cause the water tank to shift slightly, disrupting the connection between the magnetic contacts. The machine will then turn off, believing there is no attached water tank. Before removing the reservoir, turn off your machine and unplug it from the outlet. After five minutes, put the machine back together, ensuring that the magnets have full contact.
Some Keurig machines have an auto shut-off feature that is programmed to turn the machine off after a predetermined amount of inactivity. Make sure the timing for this feature is set to a suitable timeframe, or disable it completely.
9. “Add More Water” Error Message
If you have enough water in the reservoir but are still getting this message, there is a problem with how the machine is detecting the water level. Try filling the reservoir to the maximum level to see if this corrects the problem.
If not, take the reservoir out and empty it. After that, thoroughly wash it with soapy water and then rinse it. Check the valve at the bottom to ensure it is not clogged. Reposition the tank and check that it is properly seated before filling to the top.
10. My Coffee Tastes Bad
If the flavor of your Keurig coffee has suddenly changed for the worse, your machine likely needs to be thoroughly cleaned. It might be due to limescale buildup from the water supply or lingering coffee grounds that are lodged in the machine. Both of these will affect the taste of your coffee. To descaling and clean removable parts, adhere to the directions below.
Your water reservoir or the hoses might contain vinegar or descaling solution residue. In this scenario, you must drain the entire water from the machine and then run a few cycles using only brand-new, hot water. If you left a filter in the machine during the descaling process, this might have absorbed the vinegar or cleaning solution, and you will need to replace it with a fresh one.
If it’s more of general dissatisfaction with the quality of coffee that you’re brewing, try some of these tips:
- Use filtered or bottled water for brewing
- Alternatively, add a water filter to the machine
- Try a reusable K-Cup, which will allow you to brew with fresh grounds (and more of them)
- Choose a smaller cup size when brewing for stronger coffee
- Remove your coffee cup early to avoid catching the last watery drips
How to Clean a Keurig
The majority of common problems you’ll run into with the Keurig can be resolved with proper cleaning, barring any broken components or specific electrical issues. Descaling and cleaning the removable parts are the two components of this.
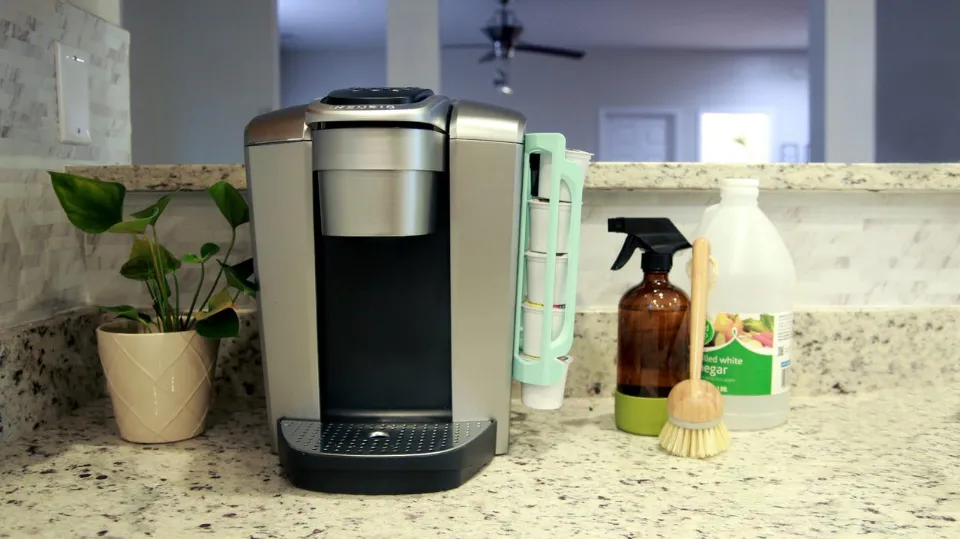
Descaling
One of the pleasures of owning a coffee maker is routine descaling. Your machine will develop limescale, also known as calcium carbonate deposits, depending on the water you use (3). Along with coffee makers, kettles, water pipes, and boilers are all impacted by this issue. Since limescale can harm the device and alter the flavor of your coffee, it needs to be removed. And regrettably, a simple rinse is insufficient.
Every 3 to 6 months, you should descale your Keurig, though this may be reduced if you use filtered or bottled water and increased if the water in your area has a high mineral content.
To descale your machine, start by tipping any existing water out. Then add an entire bottle of descaling solution to the reservoir, followed by an equal amount of water. White vinegar and water mixed in a 1:1 ratio can also be used. Use neither vinegar nor the descaling solution at the same time.
Run the machine on a brew cycle without a K-Cup inserted. Up until the reservoir is empty, repeat the process. Allow the machine to run for 30 minutes (4 hours after vinegar treatment) before turning it off, removing, and rinsing the water tank. Visit our Keurig descaler guide for comprehensive instructions.
Cleaning the Removable Parts
Just as important as describing the machine is cleaning the removable parts, which you will need to do even more regularly. When cleaning any of these parts, make sure to wait 30 minutes after your last brew cycle to allow the machine to cool.
Each week you should be removing the water reservoir, the lid, the K-Cup holder and the drip tray. These need to be cleaned with a soft cloth and warm, soapy water. While Keurig claims that some parts are dishwasher safe, hand washing will prevent any accidental damage. Completely rinse, then let air dry. Lint residue from drying with a cloth might get into your coffee or clog the machine.
For many of the solutions above, we have recommended cleaning the needles and the waterline. As frequently as necessary, you can repeat this. To clean the exit needle:
- Starting with the brewing chamber, remove the pod holder.
- To reveal the tube on the underside of the pod holder, remove the funnel. Straighten one end of a paperclip, and gently insert this into the tube, jiggling it to remove any debris.
- Allow to air dry after rinsing under running water.
The entrance needle must stay in the machine for cleaning. Two holes can be seen on the bottom of the brew head if you look there. These can be cleaned in the same manner as the exit needle. Just take care because the needle is very sharp while doing this.
Use a plastic straw to scrub the water lines.
The spout that directs water from the reservoir into the machine should be found first. Put the machine on its side over the sink, hold the straw up to the spout, and seal it with your hands. A moist paper towel would also work. If there is any debris stuck in the hose, blow hard into the straw to help release it. Any leftover grounds or waste should be flushed out after reassembly by performing a brew cycle with fresh water.
Final Thoughts
Even if your Keurig is currently functioning without issue, it still needs to be cleaned and maintained. Regular descaling and cleaning removable parts can prevent many of the issues you might encounter, as well as extending the life of your machine.
You might need to perform a complete clean-up or a full reset if your Keurig mini won’t brew. You must fully depress the power button, then unplug the device, to perform a complete reset on your Keurig mini.
The Keurig Mini shuts off automatically every 60 seconds, so keep in mind if you’re wondering why this is happening.