One of the many benefits of wooden floors is that you can usually fix the broken surfaces. Taking measurements of the damaged area is the first step in repairing wood flooring.
Depending on how severe and extensive the damage is, you can use a variety of techniques to fix the issue area. For instance, major damages like a buckled wood floor, curled corners, or cupping will call for much more experience than minor ones.
Can Wood Floors Be Repaired?
Yes, some refinishing can go a long way in repairing your wood floor. So before calling a professional, try some simple fixes.
How Do You Repair Damaged Wood Floors?
As with other home projects like installing underfloor heating, how to fix wood floor surfaces depends on the type of flooring.
Also, when you have wood floors, the type of finish, whether that’s a wax coating, aluminium oxide coating or others, helps you decide the appropriate refinishing method. For instance, paste, liquid wax, or oil can add a desired lustre to a wood floor that has a varnished or shellac finish.
As for the technique, cleaning and maintenance are always the first step in how to fix a wood floor, so concentrate on the damaged area and give it a thorough (yet gentle) cleaning. Remove all debris, including hair and dust, and clean the trouble spot if it has any dirt.
Additionally, avoid using brooms or scrub pads with abrasive materials. Instead, use a soft mop or a vacuum. Additionally, it’s not a good idea to soak the floor in water or liquid cleaners. Instead, 2 to 4 drops of liquid soap in a quart of water should do; mix them in a spray bottle, and mist your floor.
After that, lightly mist it with fresh water while mopping the surface with a microfiber mop. The floor should then be polished with a soft, dry cloth.
Tip: wax remover solutions can be excellent in cleaning off any wax before reparation.
Fix Harwood Gouges and Dents
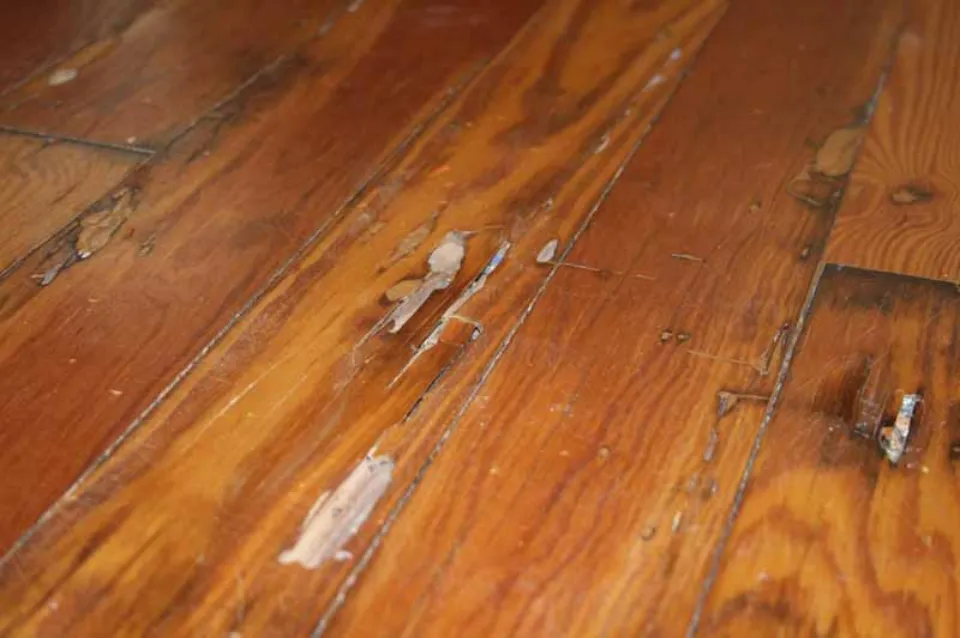
If you’ve dragged hefty furniture pieces over your floor without protecting it, they may have left gouges over its surface. Furthermore, the fibers are probably broken or frayed.
You must first purchase a wooden filler from your nearby wood flooring store before learning how to repair gouges in wood floor surfaces. And select one that is the same color as your flooring so that the repaired area blends in with the rest of the floor.
Then, insert the filler in the gouge, and give it sufficient time to dry. After that, lightly sand the filled area to give it an even, uniform appearance.
However, the simplest DIY fix can be used to fix small, surface-level gouges. Simply fill in the gouge with a brown crayon and remove any excess wax before coloring.
As for dents, the method used varies according to the finishing. To put it another way, finished and prefinished wood both receive unique treatments.
First off, heat and moisture can be used to repair minor dents in prefinished wood floors. On the damaged area, lay a damp towel. Next, place a steamer over it. You’ll start to see the floor gradually rise. To get the wood back to its original shape, keep dabbing it with the hot steamer. This process shouldn’t take more than 5 minutes.
Tip: You may have no choice but to replace your damaged floorboards with matching ones if the dents are very deep and substantial.
Secondly, you’ll be relieved to see how easy it is to fix dents in finished hardwood floors. Simply fill the dent with a little water. It might turn blue, which is “blushing”. The blue color will go away after the finish dries, so there’s no need to worry.
No matter what, dab any excess water off the water-filled dent with a damp, folded cloth. After that, press down on the cloth with a hot iron until it dries. When the dent is completely gone, check it out with a close-up inspection and repeat the previous step.
Repair Hardwood Floor Water Damage
Water is generally bad for wood floors. At worst, it can cause flooring boards to cup, warp, buckle, or develop mold. It can also damage the finish, leave rings or stains.
Hardwood floor damage can range in severity from minor to severe. It can be caused by a potted plant that leaks onto the floor, from a burst appliance supply hose, or from major flooding.
The best ways to handle water damage to hardwood floors depend on how bad it is.
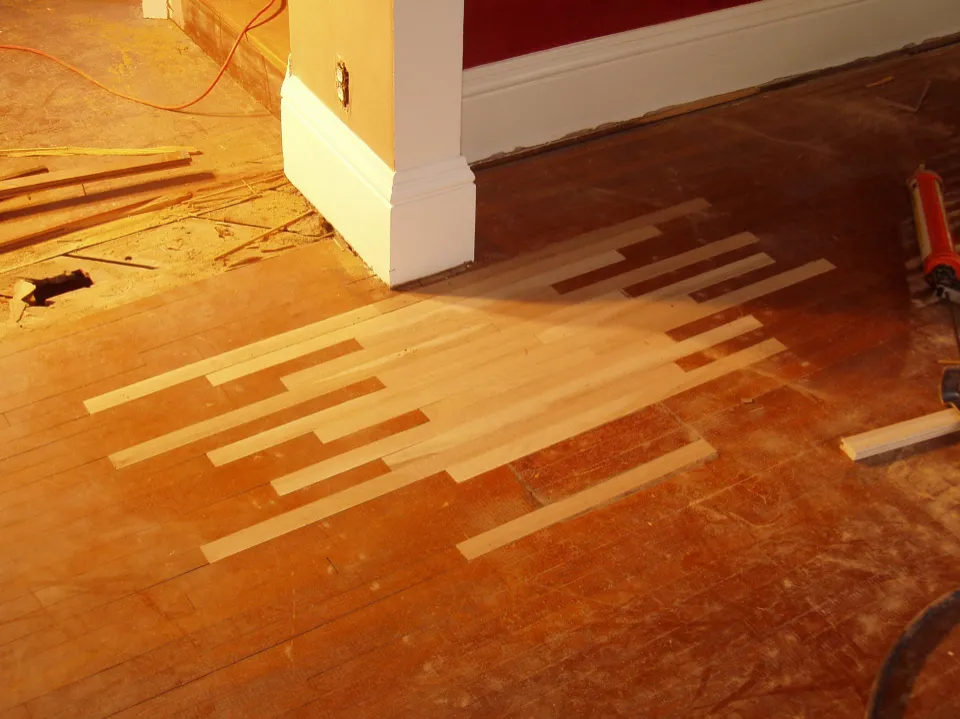
Severe water damage. It is likely that you will need to remove and replace several hardwood flooring planks if they have warped as a result of severe water damage. You often only need to replace the damaged areas. You must be able to locate and acquire identical replacements in order to accomplish this. This isn’t always possible, of course.
eradicating a water spot. You might be able to remove the stain if someone left a watermark ring on the floor from a hot coffee cup or a cold glass.
To cover the stain, fold a white cloth or rag in half. After that, iron back and forth over the stain area while using an iron set to medium heat. Do this gradually, checking frequently to see whether the stain is disappearing and to make sure you don’t cause further damage.
Larger stains on wood floors are usually water stains from spills or overwatering indoor plants. The most difficult step is to sand the area, occasionally bleach it, and then refinish it to match the rest of the floor.
A large stain should be treated by a flooring contractor, especially if it is in a prominent location.
If you do decide to take on this project yourself, this is how the process goes:
- Sand the area with a vibrating sander, first with 100-grit sandpaper and then with 150-grit.
- Vacuum the area with a shop vacuum.
- If the stain is made of oil, use mineral spirits to remove it; if it is made of latex, use water.
- Apply bleach or oxalic acid as directed on the label to a dark stain to lighten it. Then, using 150-grit sandpaper, lightly sand the wood grain in the direction of the grain.
- To match the color of the floor, mix a stain. Typically, this process involves testing potential solutions on a piece of wood from the same species as your floor.
If you are unable to locate replacement parts, you can cut them out of a closet or another inconspicuous area of your current flooring, and then install newer flooring over the area that was cut out.
Repairing Hardwood Floor Scratches
Sanding is the solution when learning how to remove scratches from wood floors. Sand that area of your flooring in the direction of the wood grain using fine-grained sandpaper. However, keep in mind that this procedure will remove your stain.
So, choose a hidden spot to test a wood stain, and see if it matches the colour of your floor before applying it elsewhere. Additionally, patch test various water- or oil-based urethane finishes to find the best one.
Tip: It might not be difficult to sand your floor if it has a polyurethane finish. To make sanding easier, you can use a scouring pad dipped in mineral spirits or a sanding screen.
How to Fix Wood Flooring Gaps
Multiple factors can cause flooring gaps. First of all, extreme moisture and temperature levels can cause your floorboards to contract and expand. Therefore, your wood would expand in the heat and contract in the cold. Accordingly, these fluctuations may create gaps over time.
Second, improper acclimatization is a contributing factor. This lack of acclimatization can separate floorboards if your flooring has not been prepared for its new environment.
Thirdly, gaps can widen as a result of initially small ones for contraction and expansion; the average around the perimeter of your room is between 10 and 15mm. Fourthly, improper installation can cause your wood boards to gradually develop gaps.
However, how to repair gaps in a wood floor is more crucial, and you can do this with a DIY mixture. To make your dust and resin mix, add sawdust of your flooring’s colour to clear resin filler, creating a firm paste. Using a spatula, fill the spaces between the floorboards with this paste. This approach ought to adequately fill your small gaps.
Repairing Wood Floor Discolouration
Discoloration of wood floors can happen for a number of reasons. Extreme weather, such as rain or UV rays, can cause the pigment in your floorboards to start fading and lightening their color. Furthermore, wood rot can change your wood’s colour, especially if it’s brown rot.
And iron staining is also a possible reason for wood discolouration. Water can therefore cause the wood to rust and produce black blotches if it had been sprayed with welding or grinding metal splatter.
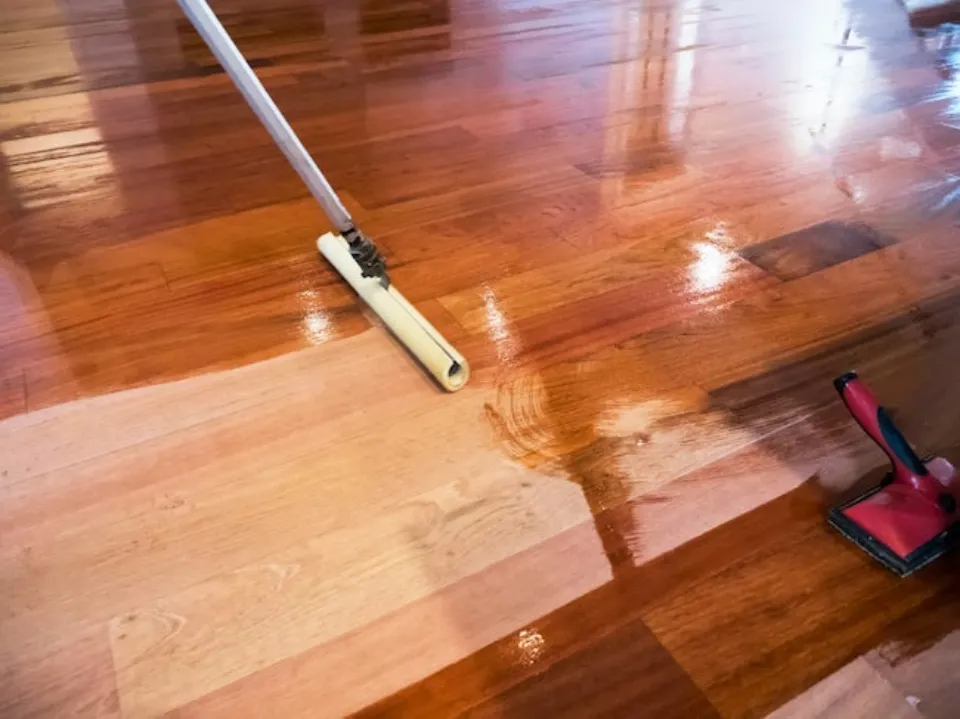
You need to set up your floor buffer with a 60-grid screen in order to address discoloration. Run it again in the direction of the board, back and forth, to take the shine off. And be careful only to make shallow indentations into the wood, just enough to remove the discoloration. After that, carefully vacuum the wood.
Afterwards, load the floor buffer with an 80-grid screen, and repeat the previous steps. Then, load it with a 120-grit screen, and repeat for the third time. The polyurethane can now be applied to the floor and in the direction of the floorboards using a paintbrush. An even coat should result from this.
Then, give your floor 8 hours for the shine to set. The floorboards should be sanded with 220-grit sandpaper to dull it, and the dust should be removed. Continue by applying a second coat of polyurethane, allowing it to dry completely, sanding it, and repeating the previous steps. Finally, a third coat is required, which needs 24 hours to set.
What Can Damage Wood Floors?
To help you watch out for them in the future, we’ll go over some things that can harm your hardwood floor.
Firstly, although rug pads can fix your rug in place so that it doesn’t slide, some types leave marks on your floor. Additionally, rubber-backed mats run the risk of affecting the color and luster of your floor. So it is advised to use felt and rubber-containing pads.
Secondly, hardwood floors can only take minimal wet cleaning. So it’s not a good idea to soak your floor in a cleaning solution. Instead, use a damp mop or cloth.
On the other side of the coin, the third reason for hardwood floor damage is neglecting to sweep your floors altogether. As a result, harmful particles like dust and dirt begin to accumulate.
Conclusion
In conclusion, there isn’t one repair method that works for all wood damage. The suitable method depends on the type of floor, type of finish and type of damage your floorboards have endured. Are there blemishes, dents, gouges, gaps, water damage, or dents?
Additionally, the severity of the damage is important. For instance, if a real wood floor has a surface scratch, we can explain how to restore it; however, more severe scratches might call for professional assistance.
Sometimes, if the damage is too severe, replacing your wood floor becomes your only option. The rest of the time, however, you can fix the type of damage to your flooring and bring your wood back to its former splendor by following our instructions.
FAQs
What Can I Use to Repair the Wood Floor?
For deeper gouges, consider using wood putty that is the same color as your hardwood. Epoxy glue can also fill small holes and gouges. For a simple DIY project, look for epoxy and applicator wood floor repair kits.
How Do You Repair Damaged Wooden Floorboards?
Cut the damaged boards in half with a wood chisel. Remove the broken floorboards. To ensure a smooth installation, square up the drilled ends with a sharp wood chisel. To replace the damaged boards, cut out new ones that are the same size as the old ones.
Can You Fix Wood Floor Damaged by Water?
In the event of significant water damage and severely swollen, warped, or partially detached wooden flooring. Typically, the only choice in this circumstance is to completely remove the wood.